


Easy-Data Mediacenter Online Help
Contact info: Support email: webmaster@easy-data.no General email: webmaster@easy-data.no
Produced and published by Easy-Data Kristen Tande. All rights reserved.
| webmaster@easy-data.no | |
| Address | 2090 Hurdal |
| Internet | http://www.easy-data.no/ |
This information is the best one available when published.
The manual are subject to changes continuously.
Hurdal - Norway, 26. 09. 2013 - © Easy-Data Kristen Tande
Program and version information |
|
| Full name: | Easy-Data Mediacenter |
| Version: | 2.3.6.0 |
| Size: | 34,7 MB |
| Release date: | 25.11.2013 |
| Prize: | Freeware |
| Downloads: | N/A |
Table of Content!
| Part 1. | Introduction |
| Part 2. | Install procedure |
| Part 3. | Quick walkthrough |
Part 4. |
The main window |
| Part 5. | The tools of Easy-Data Mediacenter |
INTRODUCTION
Easy-Data Mediacenter is developed for use width TV/home cinema sollutions. This makes it essential that the audio output is at highest possible quality. By using Wasapi exclusive mode EDM is able to deliver a unmodified bitstream to your reciever and give you a bit perfect sound sollution. Besides beeing a Audio and Video player it offers lots of tools you would normally need several applications to handle.
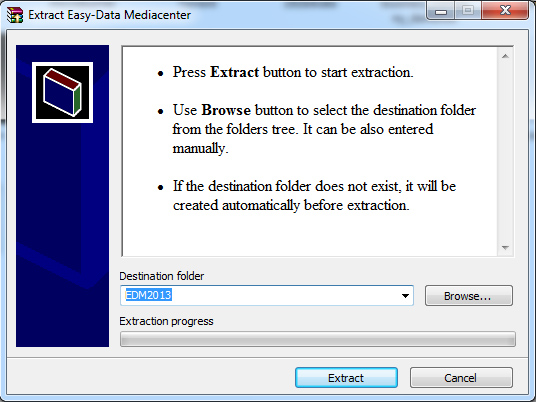
INSTALLATION
As of today there is only one option. A self extracting rar archive. Just select where to unpack it and all folders needed will be created for you. After unpacking, start up the file EDM2013.exe and go to settings menu. You will find a button named "Create Shortcut On Desktop". Click this one and you have a shortcut to the program on your desktop.
AUDIO PLAYER
GETTING STARTED
Using the Audio Player is pretty straight forward. To start playback you need to create a playlist by adding manually or by EDM2013's search engine. Or drag/drop an audio file onto the playlist from windows explorer. If EDM2013 is registered as default player you can just double-click the file you want to play and EDM2013 will start and playback the selected file. Or right-click the file in Windows Explorer and select Open Widt, and select EDM2013 from the list of available programs.
When starting playback EDM2013 initializes Wasapi with the exclusive mode option if possible. It will also try to create a 32 bit floating point channel. The reason for this is that:
Channels can be made to use 32-bit floating-point sample data. When a channel uses floating-point sample data, EDM takes full advantage of the extra resolution when generating the decoded sample data, it does not simply convert 16-bit data to floating-point. Windows Vista (and later) audio is natively floating-point, so for optimum performance (not to mention quality), EDM channels should also be floating-point. That particularly applies to formats that are decoded in floating-point anyway, ie. lossy formats like MP3 and OGG.
By use of the above settings the Audio Player is able to deliver a unmodified bitstream to your reciever and give you a bit perfect sound sollution.
If you can afford to buy a DAC (Digital Audio Converter), this is absolutely to consider. The sound output can be greatly approved using a DAC. One cheap and really good one is Abrahamsen ADAC. From the peoples behind Electrocompaniet.
The above settings can be manually changed from the programs settings menu.
When you save a playlist it will save as default to program path + and subfolder AudioPlaylists. All lists saved will show up in the Favorite Lists (bottom left corner of screen). This is for quick access to all your lists. To open a saved list just double-click the filename in the list, or select one and click the "Open" button below the Favorite Lists. To delete a favorite list click the "Delete" button. If you get a lot of lists you can search for lists by entering name (wildshards allowed) above the list and press the button "Search". Just remember to click the "Reset" button when you are finished searching to get all available files accessible again.
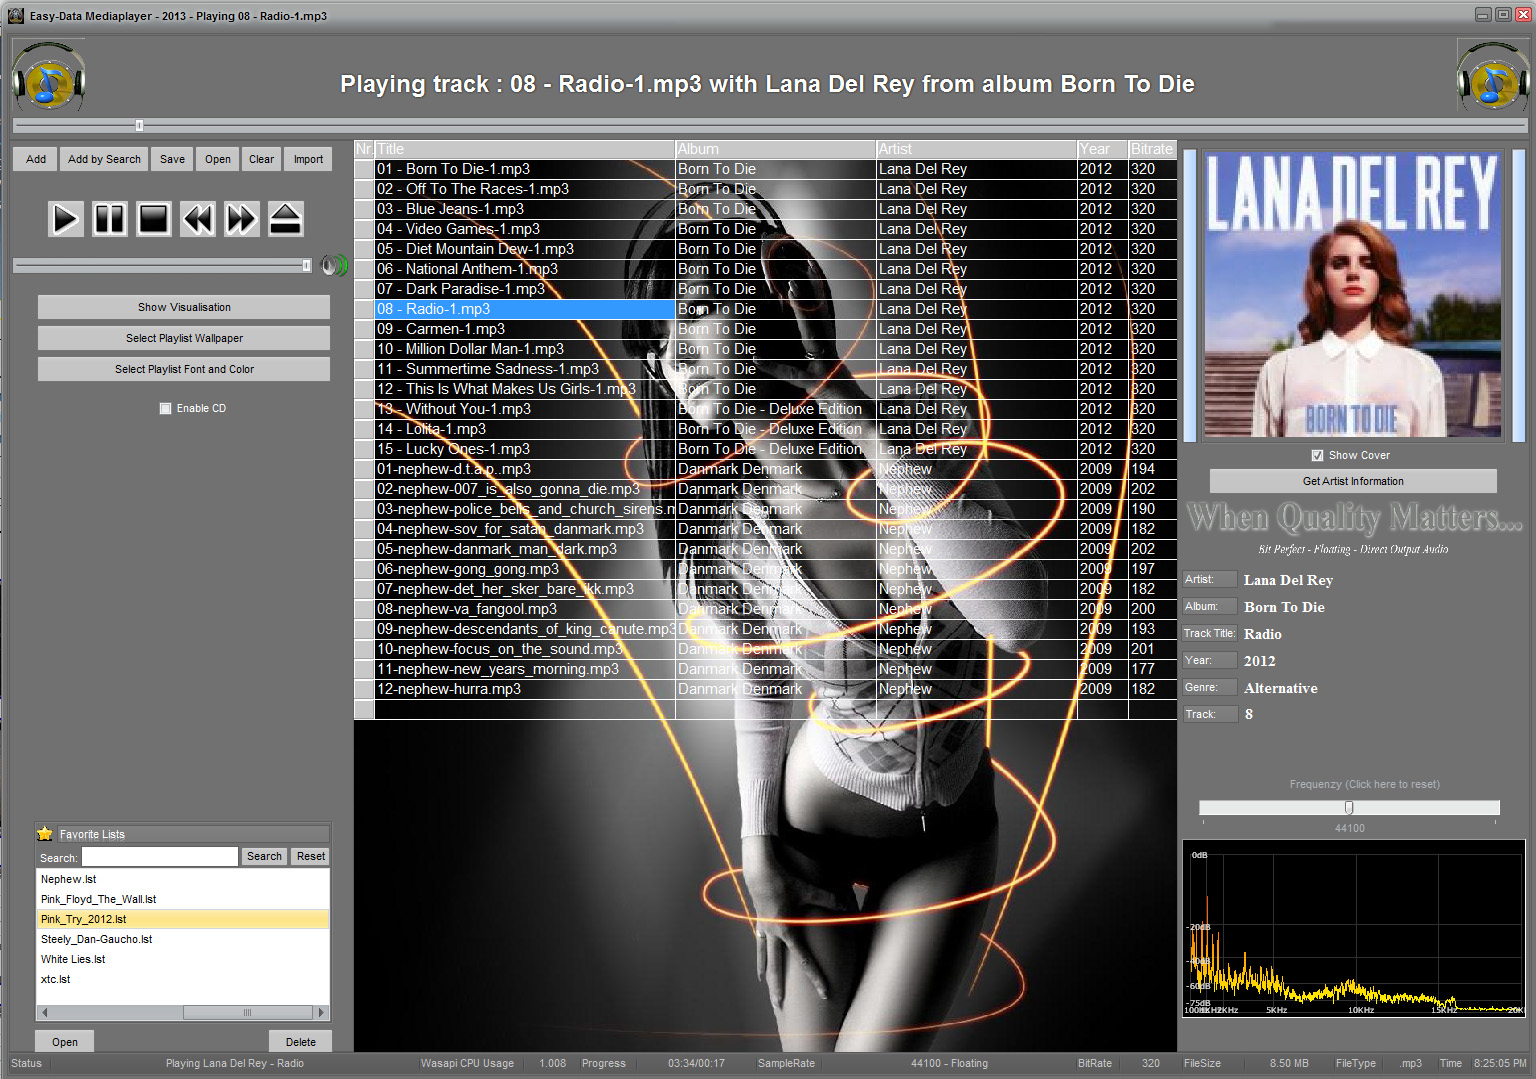
THE PLAYLIST
In the playlist you get the following information (if available): Title of track, Album name, Artist name, Year of release and Bitrate. If the files you add does not have any tags, the only list information you will get is the title. EDM2013 provides tagging tools so that you can create or edit tags directly from the program. Select a list item and right-click to get the popup menu. If the file you are playing is a .mp3 file press the "ID3v1 and ID3v2 Tag Edit" button. Is the file another format press the corresponding menu item. Note(more tag editors will be added to the program in near future).
Besides the tag editors in the popup menu you have a selection called "Copy selected to device" This part copy the selected files in the list (multiselection is allowed) to any connected device in your computer. If you have added a memory stick or external hard drive after you started EDM2013 you may need to restart the application for the devices to show up in the list. EDM2013 is able to copy files from any network placement. The speed of copying process may be slow on wireless networks, and is also usb dependent eg. Usb2.0 or 3.0.
To change the default playlist background image click the button "Select Playlist Wallpaper". You have s small selection of wallpapers to choose from, but any image can be used if you just put it in the program path folder under the subfolder named Wallpapers. If your background image is dark or bright you can adjust the playlists font and font color to match the selected wallpaper by clicking the button "Select Playlist Font and Color".
CD PLAYBACK
To start playback from a CD drive first stop any currently playing track. The reason is that CD playback uses another method than the ordinary player and changes to wasapi is needed. If you check the "Enable CD" checkbox while a track is played it will stop the playback. The CD playback list will search for track names by using freedb. This may cause you to wait a sec or two while the player is downloading needed information. The CD playback has its own play/pause button. The ordinary buttons will not work with the CD playback. Just double-click the selected track to start playback, or select a track and press the "Play/Pause" button above the list. The Speed trackbar is just for fun. It increases/decreases the cd playback speed. To automaticly play all tracks in the cd playlist check the "Auto Advance" checkbox.
If you have more than one cd/dvd drive on your system select the wanted drive from the dropdown box.
Limitations on CD playback: The "Show Cover" option does not work, and either the "Get Artist Information". This is something i am working on, so it will be available later on.
VISUALISATIONS
EDM 2013 comes with a range of visualisation files to use with the Audio Player.
To show a visualisation, just click the button "Show Visualisation". Right-clicking in the visualisation window pops up a menu where you can select witch visualisation file you want to use. Double-clicking the visualisation window makes it fullscreen view. To go back to the Audio player, right click and select "Audio Player" from the popup menu.
OTHER INFO
The "Show Cover" checkbox search the internet for the album in the playlist. EDM2013 does not use covers inside the files yet, so to get the cover you need to have the Album name in the playlist. And also internet connection. If you have trouble with internet connections beeing to slow or no connections at all, please uncheck the "Show Cover" checkbox. It is checked by default.
The Frequenzy trackbar is just for the fun of it. It changes the frequenzy of the active playing track. Some formats do not support this feature.
The Audio Player also support import of other kind of playlists. To import a playlist click the "Import" button (top, left) on the page. Select from one of the listed playlist formats you can choose from.
You can select music from the Audio Library and export it to the Audio Player.
FORCE OUTPUT MODES
If you want to force output to another frequenzy than the original you can do this in the settings menu of the program. See settings help page for information.
THE VIDEO PLAYER
GETTING STARTED
The first you need to know is how to open and start a video. This can be done in three ways.
1. Drag/drop from windows explorer onto the video panel.
2. Press the "Play" button, and select a video file from the opendialog that appears.
3. Double-click a video listed inside the "Video Playlist".
All of the above methods will start playback of video. To stop playback, either press the "Stop" button, this will stop the movie, and it will be unloaded from memory. If you want to pause playback, either press the "Pause" button or use the shortcut that is pressing "spacebar" on your keyboard.
The "Next" and "Previous" buttons are only active when there is more than one item in the "Video Playlist" If so, pressing "Next" button will start playback of next item in the "Video Playlist", and Previous the oposit.
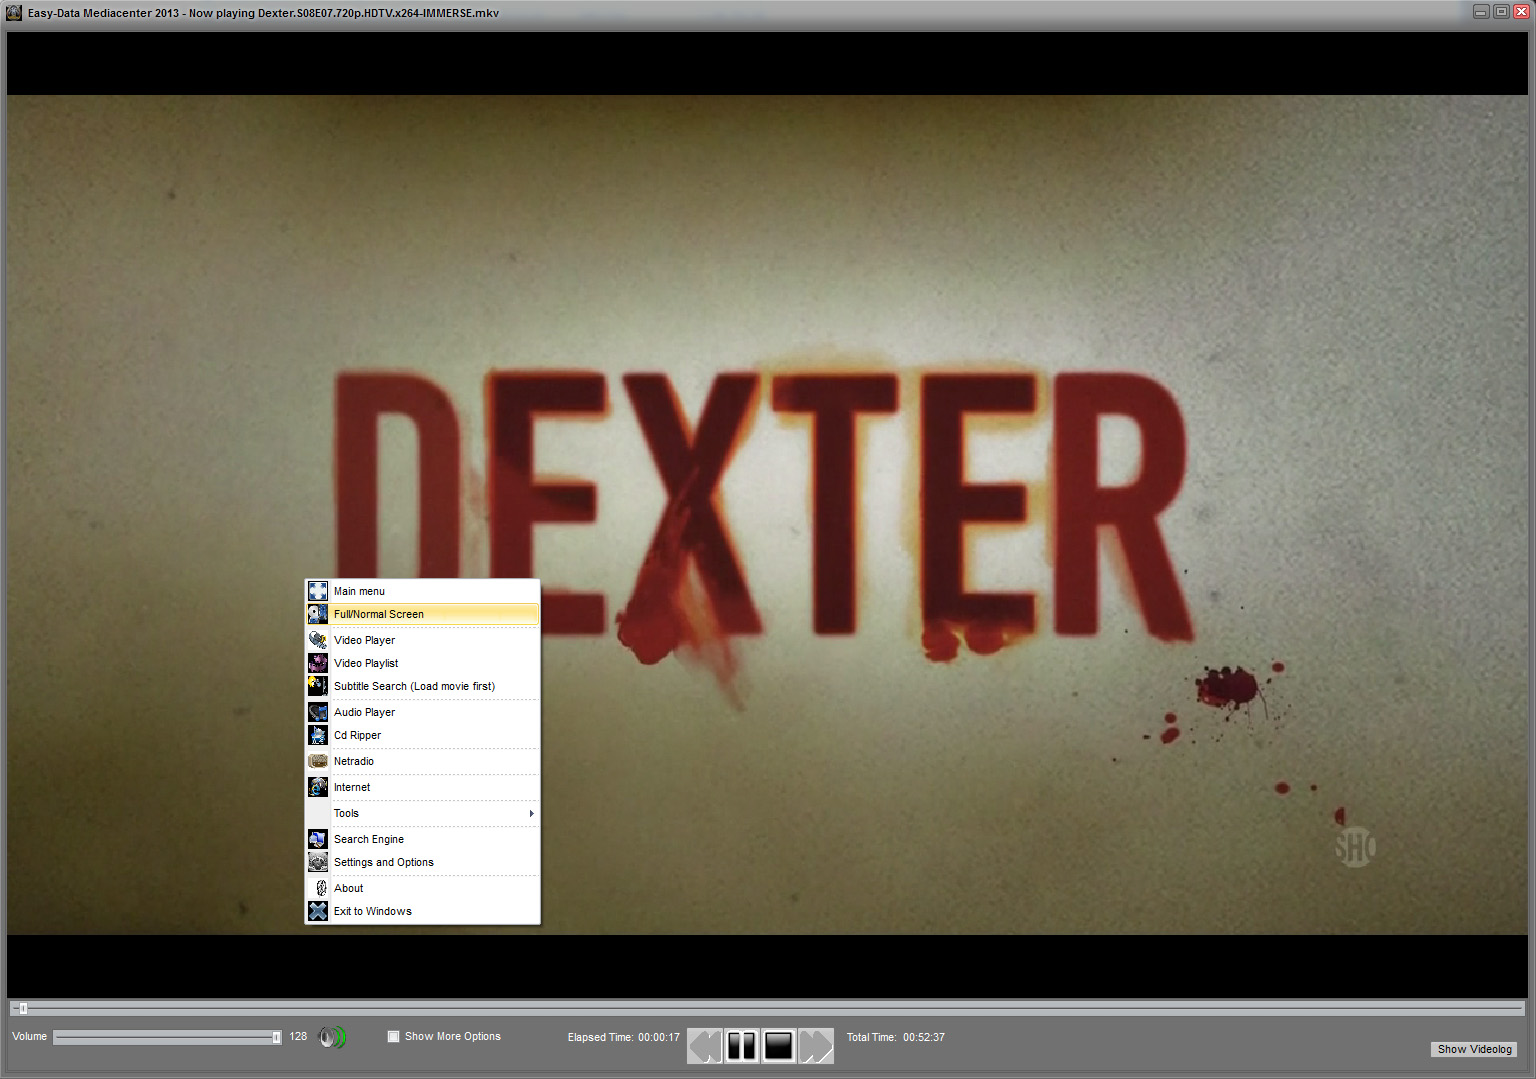
EDM2013 does not scale itself after the videos. The opened video will keep original aspect ratio but use the default window size of the program. To get a full screen view, either double-click on the video window, or right-click and select the "Full/Normal Screen" from the popup menu. Double-clicking a full screen window will set it back to default size again.
When in fullscreen mode the menu will disapear if you do not move the mouse cursor at the bottom of the screen. The mouse cursor will also disapear after a few seconds. To get it back just move the mouse to the bottom of the screen, and the menu will show itself again.
The video trackbar and volume trackbar functions like any other ordinary players, with two differences. If you click the speaker icon on the right side of the volume trackbar the audio is muted. clicking it again sets the audio volume back to previous value.
Some videos can be hard to seek in. Therefor has EDM2013 three different ways of seeking to help out with troublesome videos. By default the seeking method is set to be "sfBackward". But if you dont get it to work with your video you could try changing this option to either "sfAny" or "sfByte". These settings means:
sfBackward - seek backward
sfByte - seeking based on position in bytes
sfAny - seek to any frame, even non key-frames
To be able to change the seek setting you need to check the checkbox "Show More Options", and you find it in the lower left corner of the program.
Let us take a look at the rest of selections you get when showing more options is checked. First yoy have the "Vertical Flip" checkbox. It does just as it name says. It vertically flips the active playing movie. You may think this is a stupid idea, but i have actually come across a few movies that i had to use this setting.
Next up is the "Video Equalizer" checkbox. A floatable menu opens where you can adjust Brightness, Contrast, Saturation and Hue for the active video. To reset its value click above each slider where it says "Click here to reset". Some video formats allows more adjustements than others. You really just have to try it out.
Now there is the "Snapshot" button. Pressing this will open a save dialog where you can save a picture from the movie in .bmp format. The save dialog opens EDM2013's programpath as default.
By clicking the button "Next Frame" you pause the playback, and each time you press the button it will step one single frame forward in the movie. To make good snapshots this one can be used in combination to get exactly the picture you want.
The checkbox "Stay On Top" if checked makes the EDM2013 to always be the topmost window. Normally you dont need to check this one.
Now comes a selection of dropdown comboboxes. The "Aspect Ratio", "Audio Driver", "Video Driver", "Audio Streams", "Video Streams" and "Subtitle Streams".
In the first one, the aspect ratio, you can select to force the aspect ratio of the current movie to one of the settings in the dropdown box. Available audio drivers and videodrivers on the system is also selectable from the Video Driver and the Audio Driver dropdown boxes.
The next three dropdownboxes will be filled in when opening a movie. If the file opened has more than one video stream; audio stream or subtitle stream it will be selectable from the dropdownboxes. If any of the dropdown boxes are empty, it means that the current file does not have that kind of stream.
NB! Hardcoded subtitles will not show up as a subtitle stream in the subtitle dropdown box.
On the right side of the menu there is a button named "Show Videolog". Pressing this button opens a new window where you can read loading information for the movie. You can also go to any position in the movie by use of the video trackbar in this window, click and hold down the left mousebutton to drag slider to wanted position. Or, you can use the buttons to move by frames forward or backward. Bot single frames and keyframes are supported. You may want to pause the original playback as this will continue playing when the Video Log windows is opened. The Video Log load the movie in its own thread and do not affect the loaded movie for playback.
If your movie doesent have a subtitle, the player has a quick search option for this.
Right-click anywhere on the video window and select from menu "Subtitle Search". As it says you have to load a movie first. The reason for this is that a movie can be found in several different formats and/or qualitys and therefor it is important to search for the exact name of the movie. EDM2013 will open internet and go to subscene.com and search for a suitable subtitle file. If you find a subtitle you want to use, download it to the same folder where you have the original movie file. This is the only way you can get the subtitle file to be read when opening the movie. After downloading the movie needs to be reopened to read subtitles.
New in version 2.1.0.0 is the ability to playback from network (Http or Ftp). To do this rightclick in video window and select Open Url from the Video Players sub menu in the popup menu. Another new item is the choice to disable subtitles. This option is found under the Show More Options menu inside the player. Note that this will not remove hardcoded subtitles. As of 28/10/2013 the player also supports external subtitles (.srt). There is a new subtitle settings option available from the main popup menu. Where you also can search and download subtitles. When using external subtitles the subtitle file must have the exact same name as the video, but with the .str extension. The subtitle file must also be in the same folder as the video file.
Thats about all you need to know about the Video Player.
THE VIDEO PLAYLIST
GETTING STARTED
The Video Playlist is a kind of a video library. You can add files either by search or manually using the buttons "Add Files" or "Add Files By Search". Whenever you save a list its default location is program path and subfolder Lists. If a playlist is saved in this location it will be added to the Favorite Lists dropdown box at the top right side of the Video Playlist page. Lists saved anywhere else will not show in this list.
The "Clear List" button clears the list and prepare for a new one.
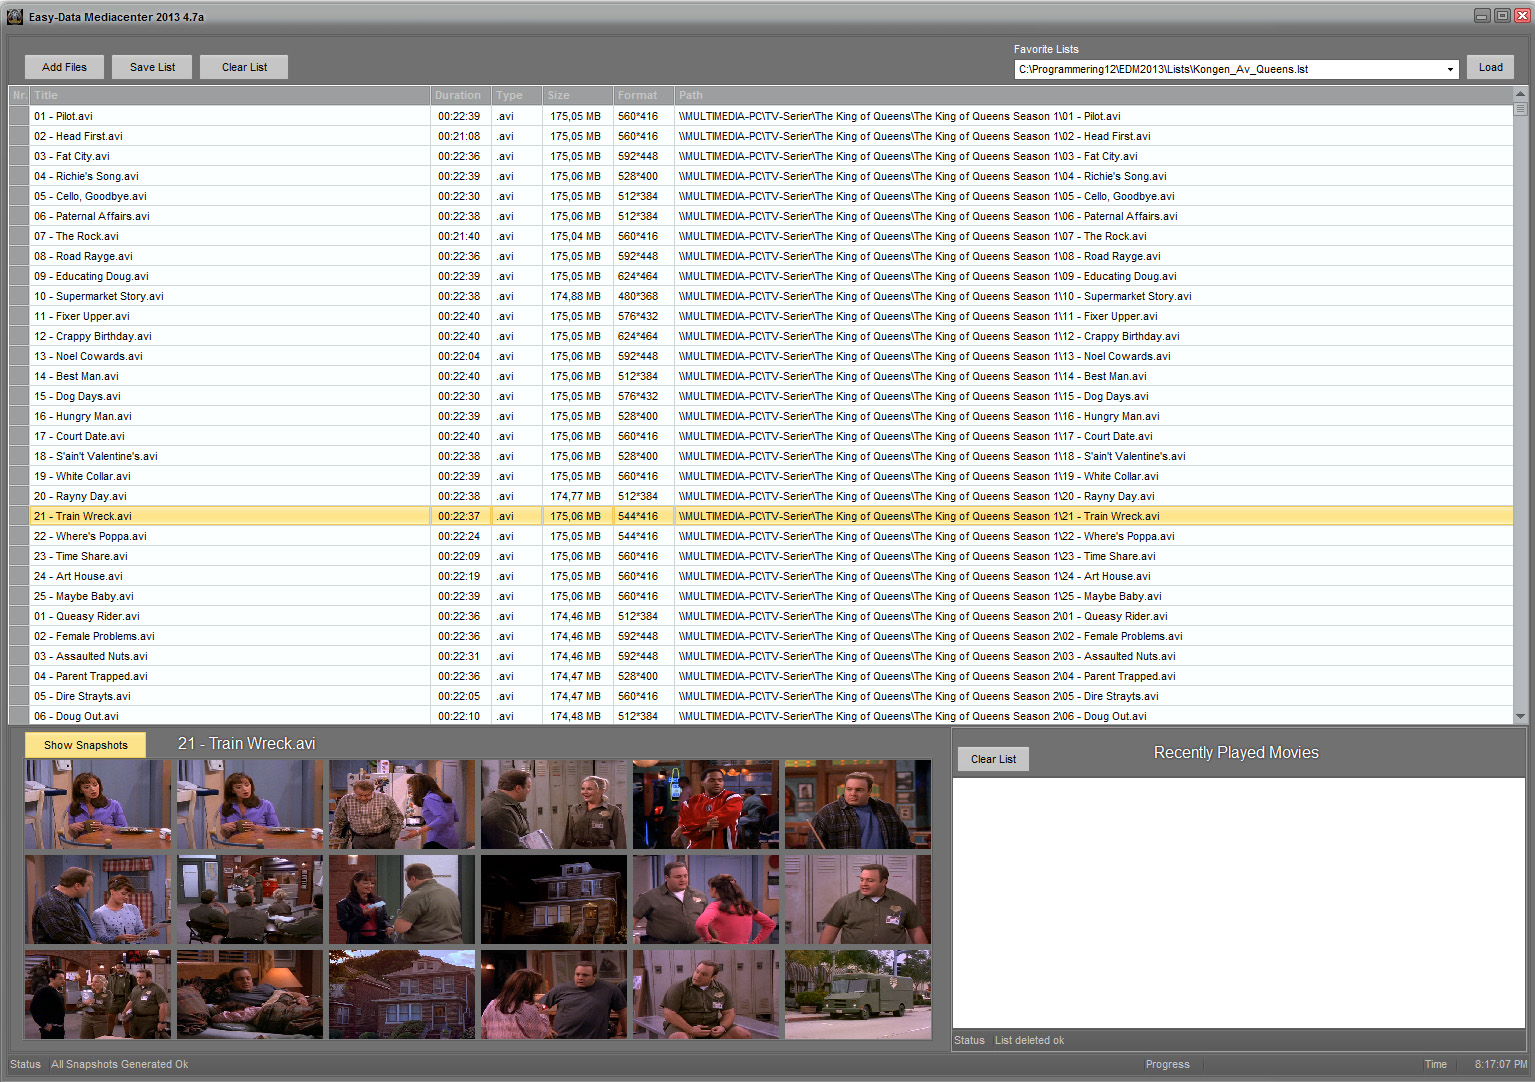
When adding files you will get the following information: Title of movie, Duration of movie, File format of movie, Size of movie, original video format (size of window), and finally the full path to the movie. The playlist does not have its own popup menu, but double-clicking a file will open it in the Video Player. To get a preview(snapshots) of the selected file, press the button "Show Snapshots". This will create 18 thumbs taking from the selected file. Double-clicking any of those thumbs opens a picture viewer with a larger view of the image. You can save images, or browse through all created images from this window.
The list "Recently Played Movies" on the bottom right side of the page is a list of all previous movies loaded in the Video Player. You get the filename, date and time for loading. To empty the list just click the "Clear List" button right above the Recent Played Movies list. You can also doubleclick any item in this list to start playback.
When it comes to adding files by search, please see the help file for the Search Engine.
THE NETRADIO
Easy-Data Mediacenter comes with Netradio support. It has 15 buttons you can add your favorite radiostations. By default is a small list of stations to choose from, just to get you started. This list can be changet at any time by checking the checkbox "Edit Radio Stations". When this checkbox is checked you will get a listview of all stations available for the moment. If you want to add a new station to the list, just click on the "Add Station" button. Enter the Station name, the bitrate (if you know it) and the url to the radiostream and press ok. The list will be saved automaticly each time you add a station. The same goes for the "Delete Station" button.
To assign wanted station to a button you have to click "Assign to button" button. Next select witch button you want to use for the selected station. They are named like this: b1, b2, b3 etc. Where b1 is the upper left button and counting upwards from there. It is a bit clumsy like it is now, but i will change this part later, so please have patient with me :-)
Playing any channel is done by pressing station button. You do not need to press the "Stop Radio" button to change station, just click directly on the next station you want.
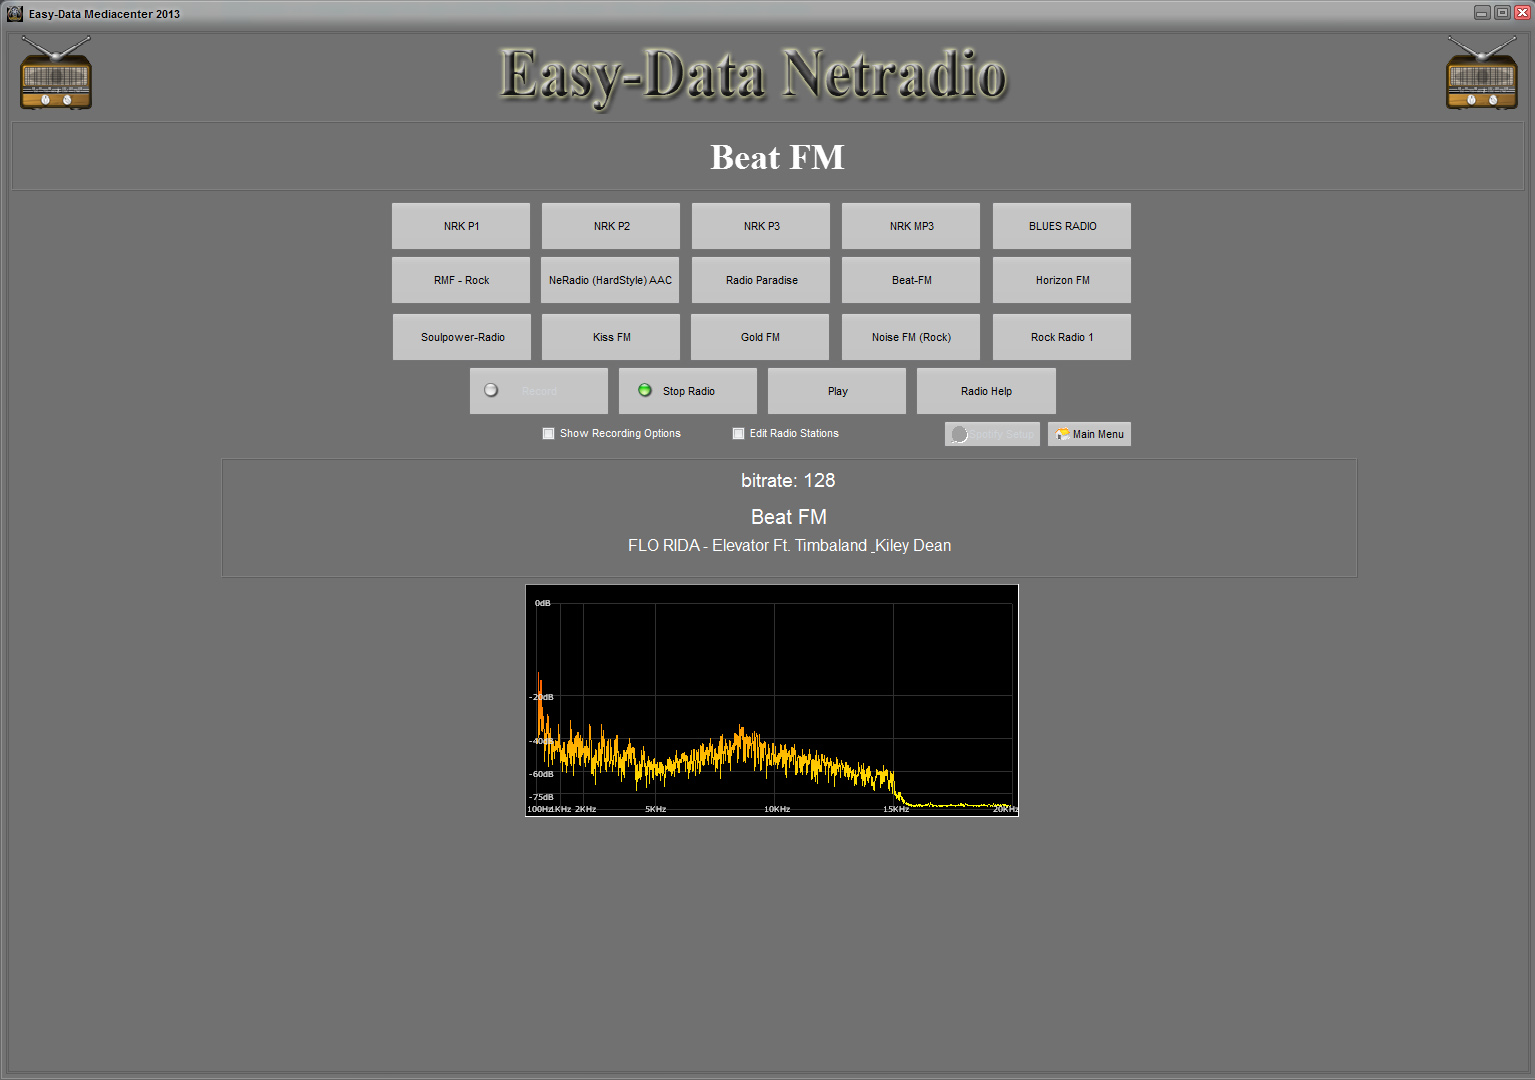
RECORDING
Before starting any recording you have to check the checkbox "Show Recording Options". A settings panel for recording options wil pop up. The first you have to do is to click the "Initialize Output" button. Note(If you connect a microphone or webcam after you started EDM2013 you will have to restart the program to get those devices in the dropdown list. Select what device you want to use, if you just want to record the radio stream you can select something like (Speakers (Realtek High Definition Audio)), Or whatever device you got for Speaker output. NB! if recording wont start, try to select another device from the list, and then go back to the previously selected device.
By default is all recorings saved to programfolder in subfolder Recording. Do you want to change the path just click on the little button at the File Placement edit, and select wanted folder. The filename is by default: Recording The extension on the file will be added after wich format you did choose. Adding tags to the recorded files must be done manually, and either from the Audio Players playlist or from the Audio Library.
Ok next up is to select what kind of format you want to record to. You can choose between MP3, OGG, WAV, AAC or FLAC. The last one, Flac is not recommended with the netradio since the overall quality on radio streams seldom is high enough to get any advantage of using tis format where the files tends to be quite big.
Now you have to select samplerate. It is really no need to change the default value thats 44100, but if you want to, you can.
Now you are finished setting up the recording. Just start a radio station and then press the "Record" button to start recording.
Thats about all you have to know about the Netradio part of the program. To find new radio stations just use google and search for it. There are tons of stations available.
THE AUDIO LIBRARY
INTRODUCTION
The new audio library is an exelent and powerful way of keeping track of your music collection. When adding music files to the library Easy-Data Mediacenter will try to get the following information out of each file:
Track Name, Artist Name, Album Name, Release Year, Track number, Bitrate, Samplerate, Size, Genre, Filetype and Path.
If the file you add has been tagged Easy-Data mediacenter is able to read tag data and use this in the library. If the file has no tag, it will still be added, but with the filename as track title. You can still create tags from inside the library by rightclicking on the file you want and edit the proper tag filetype.
Adding files to library is done by use of the inbuildt search engine, and is done in two steps. First do a search for music files with the search engine, second, select wanted files from the search result and press the button Add To AudioLibrary. Just remember that if you have a library list open in audio library the files from the search result will be added to this list. If you want to create a new list make sure no list is loaded in the audio library when starting a search.
USING THE LIBRARY
When you have added your music to the audio library you can browse the files in the list by scrolling with the mouse. If you have several thousand files this may not be the best way if you are looking for a spesific artist or song. Therefor the audio library is equiped with two kinds of search options in addition to the normal scrolling.
The first is a normal search option. You start with selecting what to search for by selecting search criteria from the drop down combobox that is one of the following choises:
Artist, Album, Title, Year,Path, Bitrate, Samplerate, Type or Genre.
If you select Artist, the search will only look at the Artist when searching, if you select Year the search will only look at Year etc.
During this kind of search the whole list is visible at all time, the search result will show a marker at the first hit, and continue to next found instance when continuing clicking serach button.
Normally you are better of using the second way of searching, by filtering. Start filtering by checking the Filter checkbox. Now select filter criteria the same way you select when searching. In the Filter Text type in your filter criteria. Any music file in the library that do not match your filter will be removed from the list, and only files containing the letters/numbers typed in the filter text is shown. To get the whole list visible again, just clear the filter text. The speed of the filtering method is quite fast. In my testlist with about 27000 posts the filtering is instant. So I would say this is the absolute best way of finding what you are looking for.
WHAT CAN I DO WITH THIS LIST?
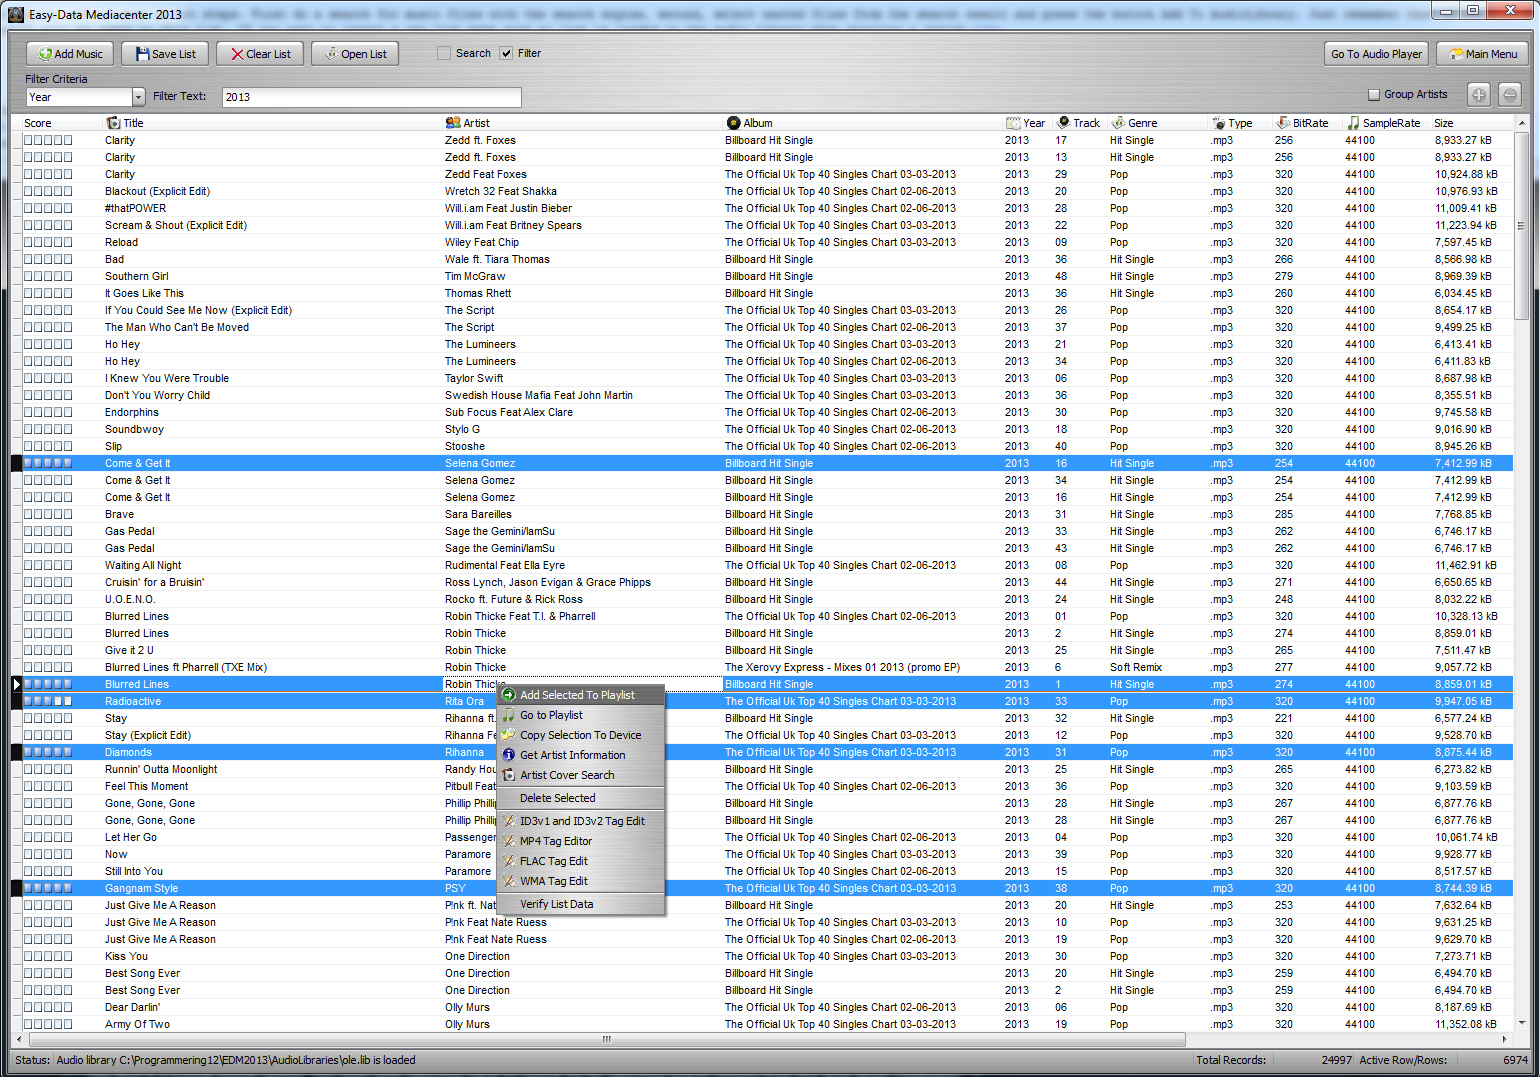
The whole point with the audio library is to get easy access to all of your music files. By right clicking the list you get a popup menu with the following choises:
Add Selected To Playlist
This will as it says add all the files you have selected to the audio players playlist. Selections is done by either holding the Ctrl key down while left clicking the files you want, or if you want a serie of files click once at the first file, then while holding down the Shift key press the last file you want. You will now see that all the files in between is marked as selected. Now rightclick anywhere inside the selected files and press the button Add Selected To Playlist.
Now you can go to the audioplayer and start playback by rightclicking once more and select Go To Playlist from the popup menu.
Copy Selection To Device
The selection is done in the same way as above. When you have your selection you can copy the original files to a memory stick, external harddisk, network location, or just another placement on your computer.
Get Artist Information
Pressing this menu will search the internet for Artist information about the selected file in the list. This is just an automatic lookup to Wikipedia, but a majority of Artists has been added to Wikipedia so it is one of the best places to look for this kind of info.
Artist Cover Search
Much as the above. But this will lookup all available covers for the specified Artist.
Delete Selected
This menu item does exactly what it says. It deletes the selected list items (Not the files, only the listing in audio library). Just remember to save the list if you want it to be remembered by Easy-Data Mediaplayer.
The Tag Editors
The next 4 menu items is tag editors for the most popular audio formats. Mp3, Flac, Mp4 and WMA. If the selected file is a Mp3 file, select the ID3 tag editor from the menu, is the selected file a Flac file then select Flac tag Edit etc.
Verify List Data
This is just a tool you can use to verify that every item in audio library exists, and if not remove those items from the library.
SLIDES MODE
Another new function is the ability to show the list as slides. This is done by checking the Slides Mode checkbox. It is a snother nice way to show the library. When in slides mode you also get to see the cover (if any).
How the cover part works
I wanted a sollution where i could get covers for all my music without having to search and download/scan covers for each album i have. The sollution I have landed on is really simple and effective. First of all you need to go to the Settings page and allow downloading of covers by checking the Allow Covers To Be Saved checkbox (checked by default). This is what happends: Every time you play a music file with the Audio Player it searches for the cover to the song. If found it saves a cover.jpg into the folder for the artist playing. In the Audio Library (in Slides mode) the library lookup the folder for each artist/album, and if it finds a cover.jpg file it loads that cover for each track in the current album. This means that if you play one track of an album, all tracks will refer to the cover.jpg file and load it. Every time you load a Library it searches through the list for covers, so changes will be updated each time you load a library. So the rule here is quite simple, if you play a music file, then you get the cover for the whole album. The drawback to this sollution is that you need to put all albums in its own folder. After all, it is just a good way of keeping your music library in a clean and nice way. Therefor I really cant see any drawback to this sollution exept when you have a Top 40 etc. list with several different artist in one single folder. But a sollution to this will come at a later time.
EXTRA INFORMATION
Well this was the popup menu. One other list item to take a look at is the Score. This is where you can select your own rating of the files in the list. As with all the other list items you can sort the list after rating. This is a nice way to find all your favorite music. So, clicking the header of each column will sort the list by the selected column. Plain and simple.
Finally i would like to mention that the audio library is not finished yet. There will be more options added in near future, but it is now safe to start building your library, future updates will not mess up your lists.
THE VIDEO LIBRARY
INTRODUCTION
The new video library is awsome when getting used to it. There are however a couple of things you do need to remember before start adding your movies. First of all you do need a separate folder for each movie. Next is to add a text file called imdb.txt with the imdb link to the movie. This is what EDM2013 uses when looking up info. Without creating the imdb text file the program wont be able to get covers and movie info. If you take the time to gather the imdb links (just go to imdb.com and search for the movies you have) You will get a nice view when browsing your movies like the test below:
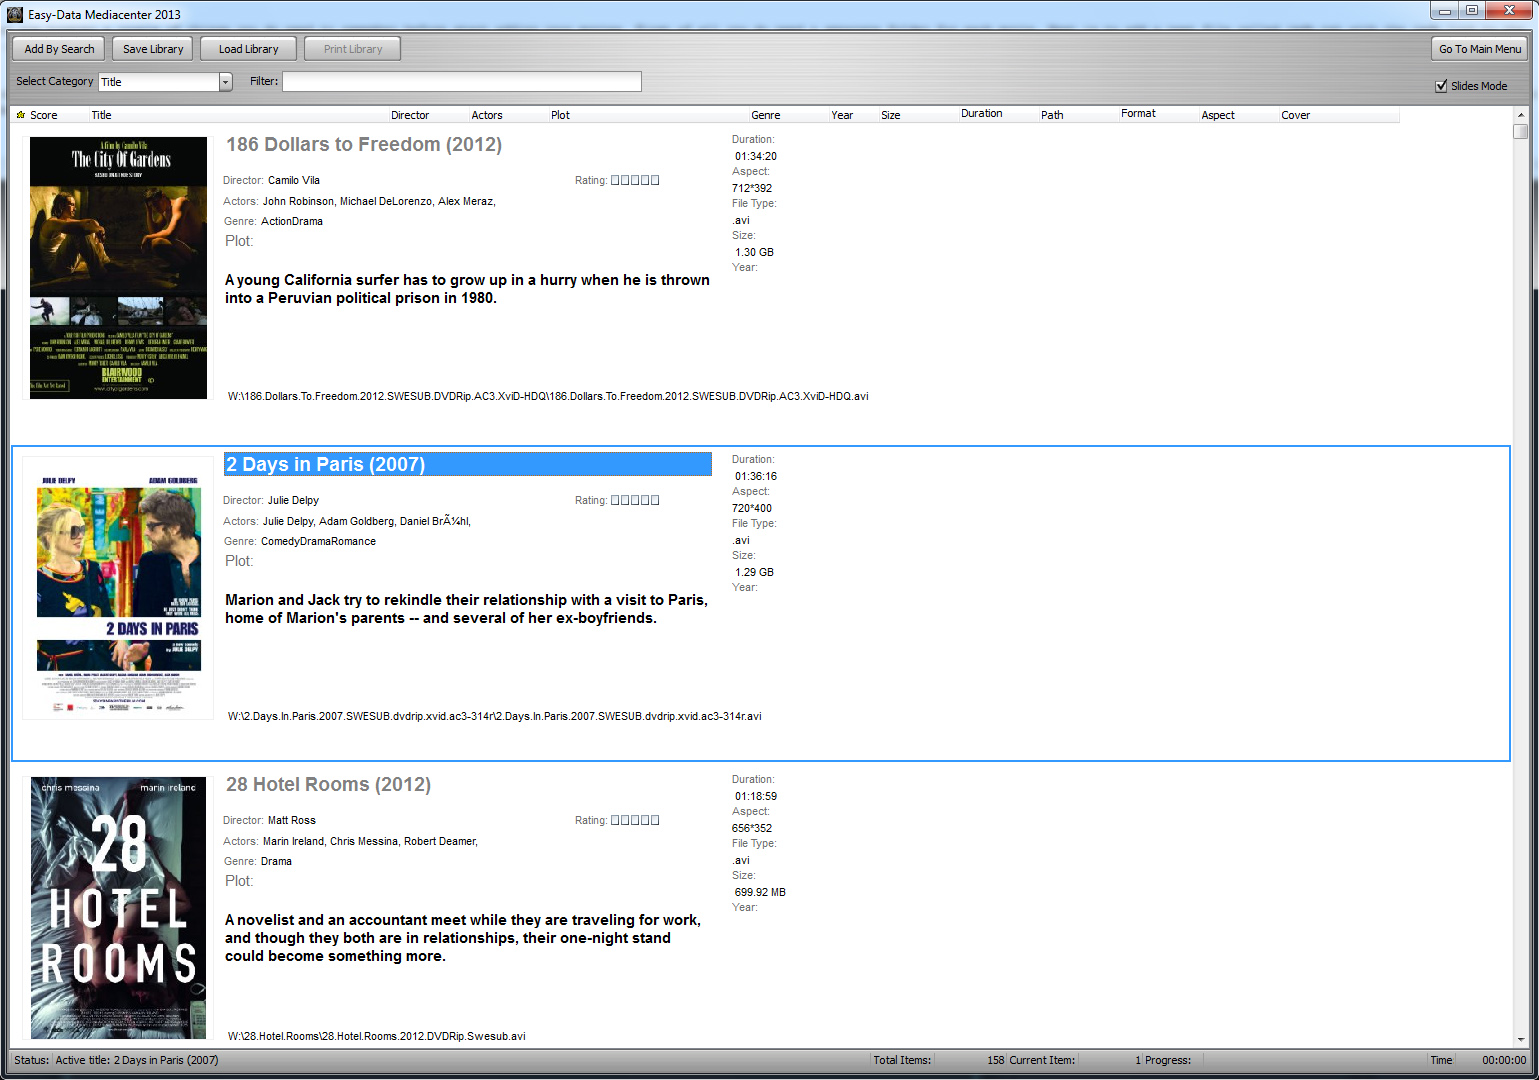
To view movies as slides you have to check the Slides Mode checkbox on the top right corner of the screen. It may take a few seconds before it shows reasoned creations of .jpg image placeholders. If you do not find covers on imdb, just try to search google for them. When you got it save it with the exact same filename as the movie itself. (Remember to have .jpg extension). To edit added movies just rightclick and select Edit Movie from the popup menu. To playback just doubleclick on the movie or select Play Movie from the popup menu.
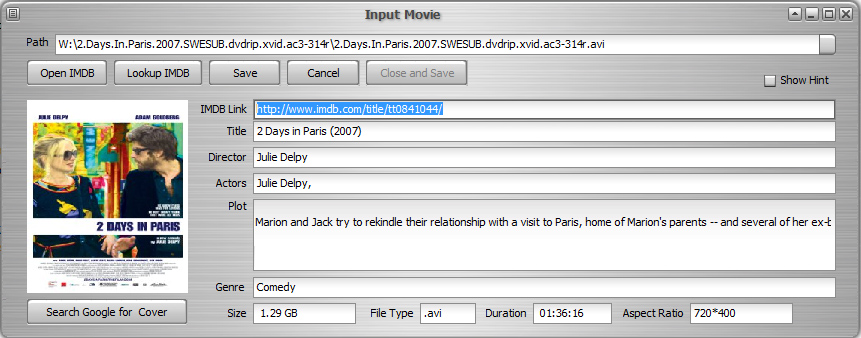
The fastest way to add movies is by use of the search engine. When adding the program looks up the imdb code from the imdb.txt file and connects to imdb.com to get info and cover. Even if you could do the same with the manual adding from the popup menu, this way is much faster. You can filter the movies by Title, Director, Actor,Plot or whatever you want. To get the year use Title, and enter the year you are intrested in.
When you load a saved library it does not load the covers before you check the Slides Mode checkbox. The reason is that EDM2013 create temporary image placeholders that use memory. So it wont load the images to reduce memory usage for the rest of the program. When you close down EDM2013 all created images is freed. (Not deleted).
Ok, one last reminder. First create a movie folder for each movie, then search imdb.com for the movie link and save the imdb.txt file into the movie folder. Something like this:
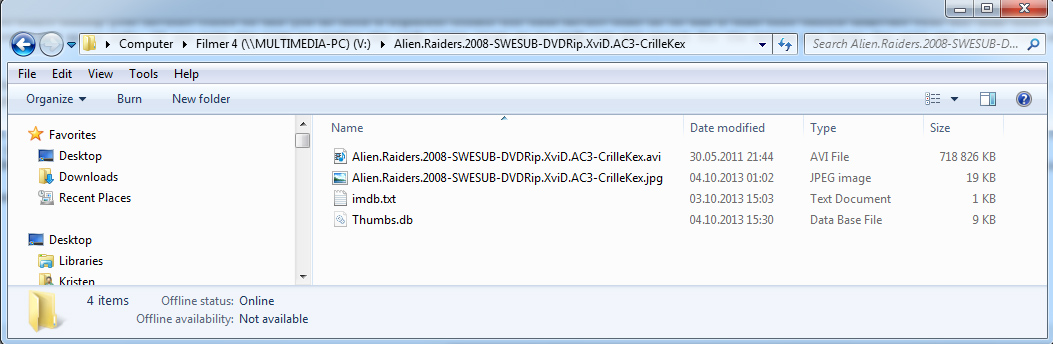
Where the imdb.txt file looks like this:
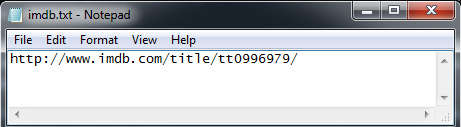
OK, now it is time for you to try it out :-)
To be continued......